Creating a survey in SurveyMonkey is simple. Creating a survey that people actually complete and that gives you useful information requires a little more planning.
You can sign in, add questions, generate a survey link, and start collecting responses fairly quickly. However, if your questions are confusing, the survey is too long, or you send it to the wrong audience, the results may not be useful.
A better approach is to follow a clear process:
Plan → Create → Design → Test → Collect → Analyze
In this guide, we will explain how to create a survey in SurveyMonkey from beginning to end, including choosing question types, adding logic, customizing the design, collecting responses, and analyzing your results.
Before You Create a Survey: Define Your Goal
Before opening SurveyMonkey and adding questions, decide what you actually want to learn.
Ask yourself:
What information do I need, and what will I do with it?
For example, a vague objective might be:
“I want customer feedback.”
A more useful objective would be:
“I want to understand why customers abandon their shopping carts before completing a purchase.”
Now you have a clear direction. Your questions could cover shipping costs, payment options, checkout problems, delivery times, pricing, and trust concerns.
Every question should connect to your main objective.
Identify Your Target Audience
Next, decide who should answer your survey.
Your audience could include:
- Current customers
- Former customers
- Website visitors
- Employees
- Students
- Event attendees
- Subscribers
- Product users
- Potential customers
Choose respondents who can actually provide the information you need.
If you want feedback about an event, survey attendees. If you want to understand subscription cancellations, survey former subscribers.
Choose the Right Survey Type
SurveyMonkey can be used for many purposes.
| Survey Type | Common Purpose |
|---|---|
| Customer satisfaction | Measure customer experience |
| Employee survey | Understand employee opinions |
| Product feedback | Improve products or features |
| Market research | Understand potential customers |
| Event feedback | Evaluate an event |
| Website survey | Collect visitor feedback |
| Education survey | Gather student or teacher feedback |
Once you know your objective, audience, and survey type, you are ready to build.
How to Create a Survey in SurveyMonkey
SurveyMonkey’s exact interface and available features can vary depending on your account and plan, but the basic process remains similar.
Step 1: Create or Sign In to Your SurveyMonkey Account
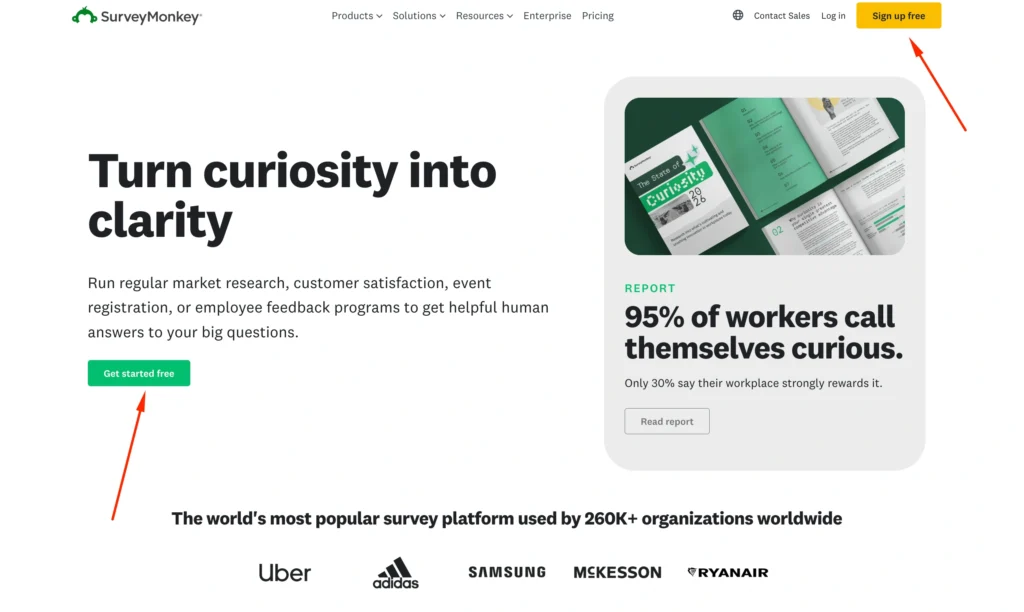
Start by signing in to your SurveyMonkey account. If you are new to the platform, create an account and complete the initial setup.
The main survey workflow generally includes four stages:
Design Survey: Create and edit questions.
Preview: Test the survey before publishing.
Collect Responses: Decide how respondents will access it.
Analyze Results: Review and understand the responses.
A simple way to remember the process is:
Design → Preview → Collect → Analyze
Organize Your Surveys
If you plan to create several surveys, use clear internal names.
Instead of:
Customer Survey
Use:
Q3 Customer Satisfaction Survey – Website Orders
Clear names make surveys easier to find later.
Step 2: Create a New Survey
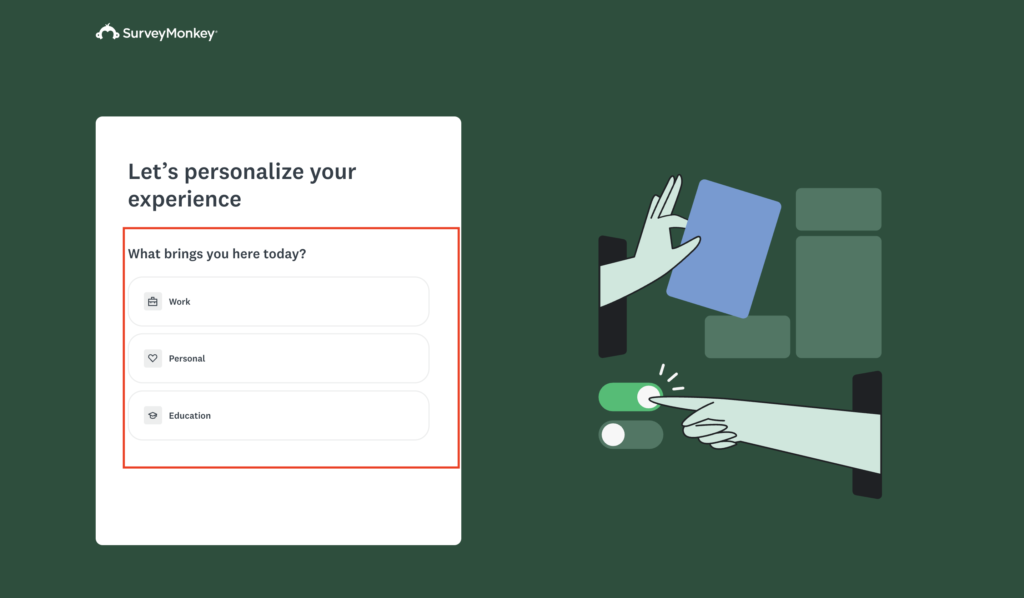
Select the option to create a new survey.
You will normally have different ways to begin, but the two most important are starting from scratch and using a template.
Start From Scratch
Starting from scratch gives you maximum control.
You decide:
- Which questions to include
- Which question types to use
- How questions are ordered
- How many pages you need
- Which questions are required
- Whether logic is necessary
This approach works best for specific research projects.
Use a Survey Template
SurveyMonkey also provides templates for common situations such as:
- Customer feedback
- Employee engagement
- Events
- Education
- Market research
- Product feedback
Templates can be especially useful for beginners because you do not have to start with a completely blank survey.
| Situation | Better Option |
|---|---|
| First-time user | Template |
| Standard satisfaction survey | Template |
| Need something quickly | Template |
| Specific research project | Start from scratch |
| Unique customer research | Start from scratch |
| Need complete control | Start from scratch |
Remember that a template is only a starting point. Remove questions that are irrelevant and rewrite anything that does not fit your audience.
Step 3: Add a Survey Title and Introduction
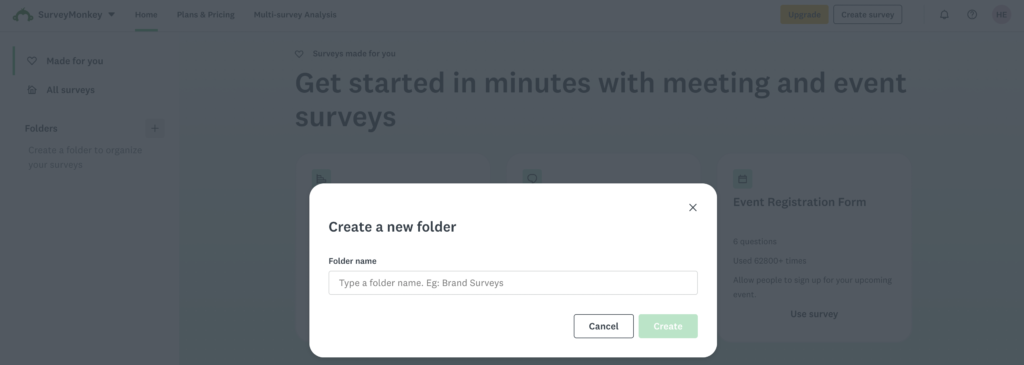
Give respondents a clear idea of what they are completing.
For example:
Customer Satisfaction Survey
or:
2026 Employee Engagement Survey
Then add a short introduction.
A good introduction should briefly explain:
- Why you are conducting the survey
- How long it takes
- How the answers will be used
- Relevant privacy information, if necessary
For example:
Thank you for taking our customer feedback survey. It should take approximately three minutes. Your responses will help us improve our products and customer experience.
Avoid long introductions. Respondents should be able to start quickly.
Step 4: Add Your Survey Questions
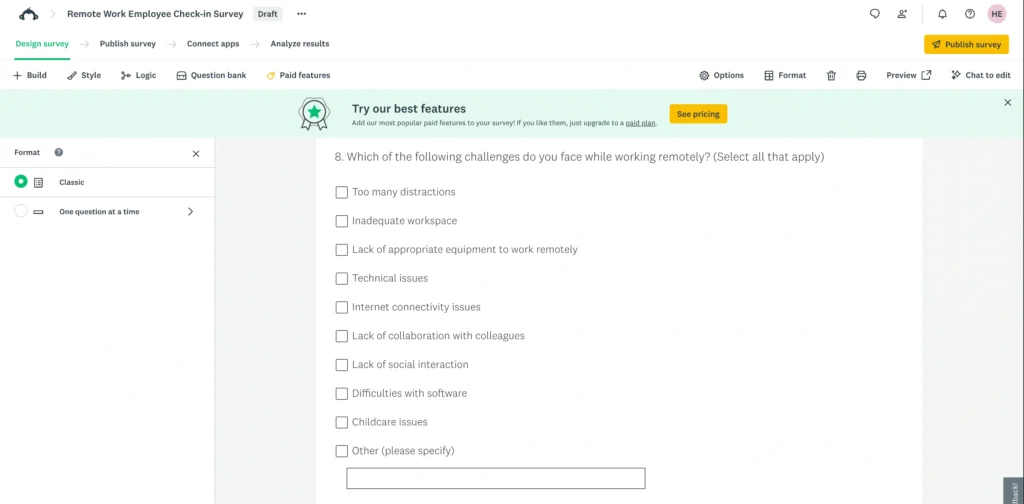
SurveyMonkey supports several question types. Choosing the correct format can improve both response quality and analysis.
Multiple-Choice Questions
Multiple-choice questions work well when respondents should select one answer.
For example:
How often do you use our product?
- Every day
- Several times a week
- Several times a month
- Rarely
- This is my first time
These questions produce structured data that is easy to compare.
Checkbox Questions
Checkboxes are useful when respondents should be allowed to select several answers.
For example:
Which features do you regularly use? Select all that apply.
- Analytics
- Reports
- Automation
- Email marketing
- Integrations
- CRM
Use checkboxes only when multiple choices can legitimately apply.
Rating Scale Questions
Rating scales measure satisfaction, quality, importance, ease of use, or likelihood.
For example:
How satisfied are you with our service?
1 – Very dissatisfied
2 – Dissatisfied
3 – Neutral
4 – Satisfied
5 – Very satisfied
Keep scales balanced and consistent throughout your survey.
Likert Scale Questions
Likert scales measure agreement with a statement.
For example:
“The website was easy to navigate.”
- Strongly disagree
- Disagree
- Neither agree nor disagree
- Agree
- Strongly agree
These are useful for customer satisfaction, employee engagement, usability, and brand perception surveys.
Matrix Questions
A matrix lets respondents rate several related items using the same scale.
| Area | Poor | Average | Good | Excellent |
|---|---|---|---|---|
| Customer service | ○ | ○ | ○ | ○ |
| Product quality | ○ | ○ | ○ | ○ |
| Delivery | ○ | ○ | ○ | ○ |
| Website experience | ○ | ○ | ○ | ○ |
Matrix questions save space but can become difficult on mobile devices. Keep them short.
Open-Ended Questions
Open-ended questions allow respondents to answer in their own words.
For example:
What is one thing we could do to improve your experience?
They are useful for collecting suggestions, explanations, complaints, and ideas that you may not have anticipated.
Do not overuse them. Typing takes more effort than selecting an answer.
A good survey might contain several structured questions and one or two open-ended questions.
Step 5: Write Better Survey Questions
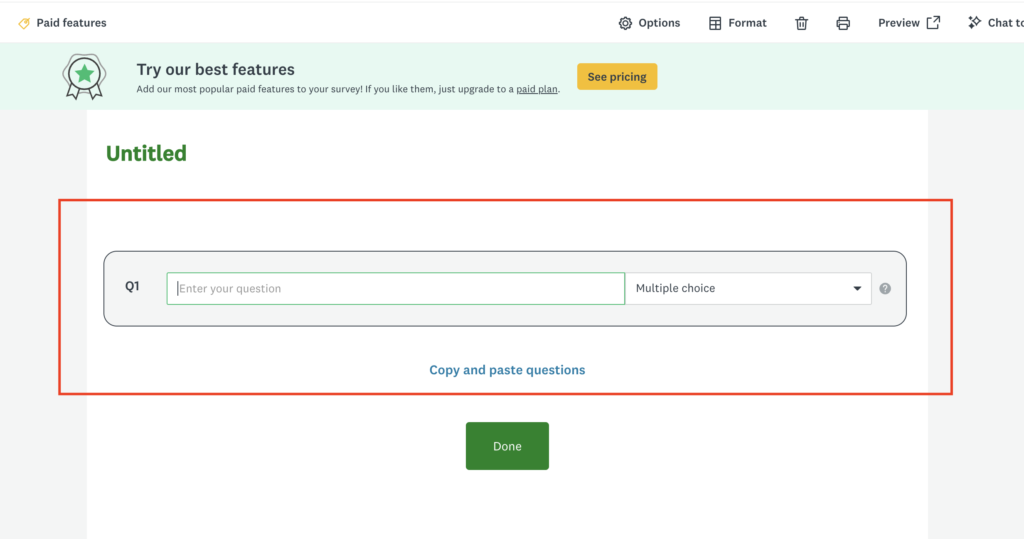
Choosing the right question type is only part of the process. Your wording also matters.
Keep Questions Simple
Avoid complicated language.
Instead of:
To what degree would you characterize your overall satisfaction regarding your most recent customer service interaction?
Ask:
How satisfied were you with your most recent customer service experience?
Simple questions are easier to understand.
Avoid Double-Barreled Questions
Do not ask two things at once.
Bad:
How satisfied are you with our pricing and customer service?
A respondent may like one and dislike the other.
Instead, ask separate questions about pricing and customer service.
Avoid Leading Questions
Do not encourage a particular response.
Bad:
How satisfied are you with our excellent customer service?
Better:
How satisfied are you with our customer service?
Neutral wording produces more reliable feedback.
Step 6: Organize Questions in a Logical Order
Question order affects how easy the survey feels.
Start with simple questions and move toward more detailed ones.
A customer survey might follow this structure:
Section 1: General Experience
Ask about overall satisfaction and usage.
Section 2: Product Experience
Ask about features, quality, and ease of use.
Section 3: Customer Support
Ask about response time and issue resolution.
Section 4: Future Intentions
Ask whether respondents would purchase again or recommend the company.
Section 5: Final Feedback
Finish with an open-ended question or demographic information.
Sensitive questions about age, income, or personal details are usually better placed near the end unless they are essential for screening respondents.
Step 7: Add Pages and Sections
Long surveys do not need to appear on one page.
You can organize questions into sections such as:
Page 1: About Your Purchase
Page 2: Product Experience
Page 3: Customer Service
Page 4: Overall Satisfaction
Page 5: Additional Feedback
Pages are particularly helpful when using skip logic.
However, avoid creating too many page breaks. A short survey with six questions does not need six pages.
Step 8: Make Important Questions Required
Some questions can be marked as required where supported.
For example:
Overall, how satisfied are you with our service?
Making an important question required can help prevent missing data.
However, avoid making everything mandatory.
Before requiring a response, ask:
Can every respondent reasonably answer this question?
If not, leave it optional, provide a Not applicable option, or use logic to prevent irrelevant questions from appearing.
Step 9: Add Skip Logic
Skip logic allows respondents to follow different survey paths depending on their answers.
Suppose you ask:
Have you purchased from us before?
- Yes
- No
People who answer Yes could see questions about their purchase experience.
People who answer No could skip those questions and instead answer why they have not purchased.
A basic flow could look like this:
Purchased before?
If Yes:
→ Purchase Experience
→ Product Satisfaction
→ Customer Service
If No:
→ Reasons for Not Purchasing
→ Purchase Intentions
Both groups can then continue to final feedback.
Skip logic makes surveys more relevant and prevents inaccurate answers.
Always test every major logic path before publishing.
Step 10: Customize Your Survey Design
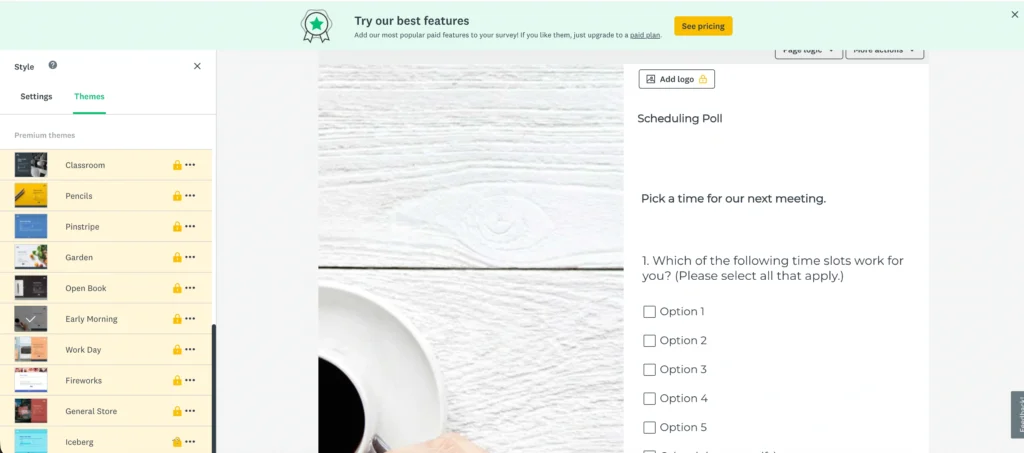
Once your questions are ready, customize the appearance.
Depending on your SurveyMonkey subscription, you may be able to adjust:
- Fonts
- Colors
- Themes
- Backgrounds
- Layout
- Branding
- Logo
Keep the design simple.
Use readable fonts, good contrast, consistent formatting, and enough spacing.
Businesses may also want to add their logo where supported. Branding can reassure customers or employees that the survey is official.
However, the logo should not dominate the page. Questions remain the main content.
Step 11: Create a Thank-You Message
Give your survey a clear ending.
For example:
Thank you for completing our survey. Your feedback will help us improve our products and customer experience.
If something happens afterward, explain it.
For example:
Thank you for participating. The prize draw winner will be contacted after the survey closes.
A clear completion message confirms that the response has been submitted.
Step 12: Preview and Test Your Survey
Never launch immediately after writing your final question.
Preview the entire survey.
Check:
- Spelling
- Grammar
- Question order
- Answer choices
- Required questions
- Page breaks
- Skip logic
- Survey completion
- Thank-you message
Complete the survey yourself using different answer combinations.
Test on Mobile
This is especially important.
A survey that looks perfect on a desktop can be frustrating on a smartphone.
Pay attention to matrix questions, long answer choices, large text blocks, images, and rating scales.
If possible, ask someone else to test your survey. If they misunderstand a question, rewrite it rather than explaining what you intended.
Step 13: Choose How to Collect Responses
Once the survey is ready, decide how people will access it.
| Collection Method | Best For |
|---|---|
| Web link | General sharing |
| Defined respondent lists | |
| Social media | Broad audiences |
| Website | Visitor feedback |
| QR code | Offline audiences |
Web Link
A survey link can be shared through email, messaging apps, newsletters, websites, and internal company platforms.
Email works well when you already have a specific respondent list.
Keep your invitation short.
For example:
We’d love your feedback about your recent purchase. The survey takes about three minutes and will help us improve our customer experience.
Social Media
Social sharing can generate responses quickly, but you have less control over who participates.
Keep this in mind when your research requires a specific audience.
Website
Website surveys are useful for short questions such as:
Did you find what you were looking for today?
Keep website surveys especially short.
QR Code
QR codes work well for restaurants, events, stores, hotels, packaging, receipts, and printed materials.
Always test your QR code before distributing or printing it widely.
Step 14: Launch and Monitor Your Survey
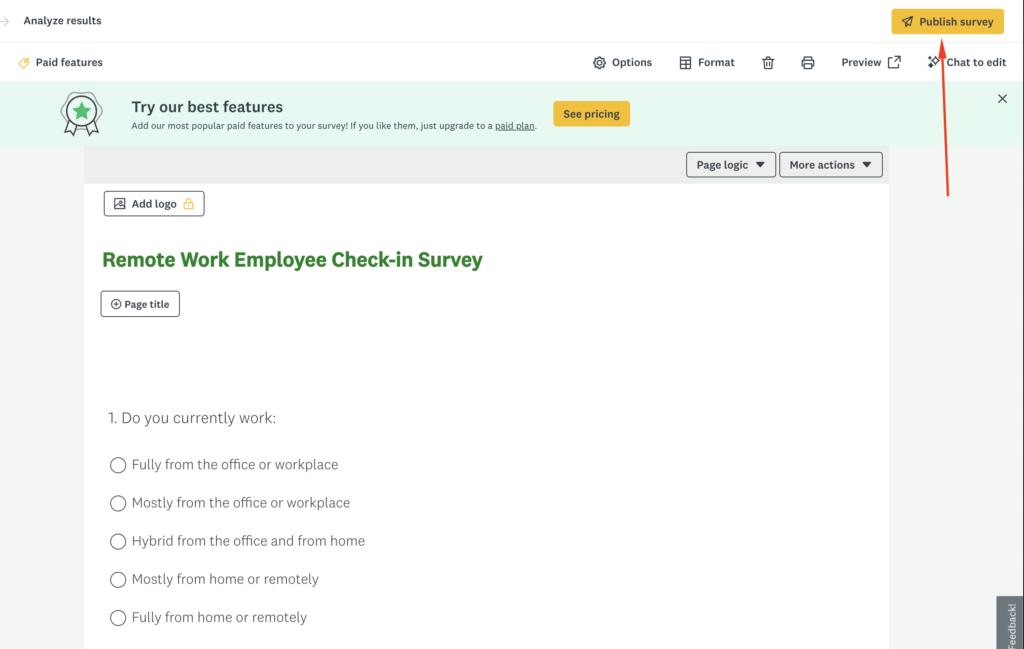
Before launching, perform one final check.
Confirm that:
- The correct survey is being shared
- Questions are final
- Logic works
- Mobile display is correct
- The invitation is clear
- Any closing date is correct
- The final page works
For an important project, consider a small pilot with 10 to 20 respondents.
After launching, monitor your responses.
Look at:
- Number of completed surveys
- Frequently skipped questions
- Common responses
- Unusual patterns
- Repeated complaints
- Open-ended feedback
If many people abandon the survey at the same point, investigate that section.
Step 15: Analyze SurveyMonkey Results
Once enough responses have arrived, move to the analysis area.
Start with each question individually.
Ask:
- Which answer was most common?
- Which answer was least common?
- Are results mainly positive or negative?
- Are there unexpected findings?
- Are patterns appearing repeatedly?
Use Filters
Filters can reveal differences between respondent groups.
Suppose your overall satisfaction score is 7.5/10.
After filtering, you find:
| Customer Group | Satisfaction |
|---|---|
| New customers | 8.8/10 |
| Customers for 12+ months | 6.2/10 |
Now you know that long-term customers may have a specific problem.
That insight is more useful than the overall average alone.
Review Open-Ended Feedback
Written responses often explain why a score is high or low.
Group comments into themes such as:
- Pricing
- Customer support
- Missing features
- Delivery problems
- Website issues
- Product quality
Look for repeated patterns rather than making decisions based on one unusual comment.
Step 16: Export and Share Your Results
Export options vary depending on your SurveyMonkey plan.
Different formats are useful for different purposes.
| Format | Best For |
|---|---|
| Reports and presentations | |
| Spreadsheet | Calculations and deeper analysis |
| Charts | Visual presentations |
| Raw data | Detailed external analysis |
When presenting results, summarize the most important findings rather than sending hundreds of raw responses.
For example:
Key Findings
- 82% of customers were satisfied with product quality.
- 61% believed delivery could improve.
- Long-term customers had lower satisfaction scores.
- Pricing was the most common issue in written feedback.
Then decide what actions should follow.
Best Practices for Creating Better Surveys
Keep your survey focused. Every question should support your objective.
Keep it short whenever possible. If 10 questions can give you what you need, do not ask 25.
Start with easy questions and move toward more detailed ones.
Use simple, neutral language.
Make the survey mobile-friendly and avoid oversized matrix questions.
Provide Other or Not applicable when respondents may not fit your predefined options.
Use open-ended questions selectively.
Explain why feedback matters and provide a realistic completion-time estimate.
Most importantly, test everything before launch.
Common SurveyMonkey Mistakes to Avoid
Creating Questions Before Defining Your Goal
Without an objective, surveys often become collections of unrelated questions.
Asking Two Things at Once
Do not combine pricing, quality, support, or other separate topics into one question.
Using Biased Language
Keep wording neutral rather than suggesting the “correct” response.
Making Everything Required
Too many mandatory questions can frustrate respondents.
Creating Giant Matrix Questions
Large matrices can be particularly difficult on smartphones.
Ignoring Survey Logic
Do not make people answer questions that clearly do not apply to them.
Publishing Without Testing
Test the complete survey and every important logic path before launch.
FAQs About Creating a Survey in SurveyMonkey
How do I create a survey in SurveyMonkey?
Sign in, create a new survey, use a template or start from scratch, add your questions, configure the design and logic, preview the survey, choose a collection method, and begin collecting responses.
Can I create a SurveyMonkey survey for free?
SurveyMonkey offers a free account option, but limits apply. Advanced functionality, exports, logic, customization, and response limits can depend on your plan.
Should I use a template or start from scratch?
Templates work well for common survey types and beginners. Start from scratch when you need highly specific questions or complete control.
How many questions should my survey contain?
There is no fixed number. Include enough questions to achieve your objective without asking for unnecessary information.
Can I make questions required?
Yes, supported questions can be required. Use this selectively, especially when some questions may not apply to everyone.
Can SurveyMonkey surveys use skip logic?
SurveyMonkey provides logic features for supported surveys and plans. These can direct respondents to different questions based on previous answers.
Can people complete my survey on mobile?
Yes. However, always preview the survey on mobile before publishing to ensure the questions and scales are easy to use.
Can I edit a survey after publishing?
Editing may be possible, but major changes after responses have been collected can make your data difficult to compare consistently.
Final Thoughts
Creating a survey in SurveyMonkey becomes much easier when you follow a clear process.
Start by defining what you want to learn and who should answer your questions. Then decide whether a template or blank survey is more suitable.
Choose question types carefully. Multiple-choice questions work well for structured data, rating and Likert scales measure opinions, matrix questions organize related ratings, and open-ended questions provide detailed feedback.
Organize your questions logically, use skip logic when necessary, and keep the design simple and readable.
Before publishing, test everything on desktop and mobile.
Once responses arrive, do more than look at overall percentages. Compare different groups, review written comments, identify patterns, and turn your findings into actions.
Before adding any question, ask yourself:
“What decision will this answer help me make?”
If you cannot answer that clearly, the question probably does not belong in your survey.